This tutorial shows you how to set up Windows Mail for Vista to work with your e-mail account. You will need your setup email to along with the password for your email account to be able to setup an email account in Windows Mail.
Please Note: We provide online tutorials to help you configure your email software as a courtesy. However, our support staff are unable to provide any support on how to use or configure third-party software on your computer, laptop, tablet or smartphone. We will provide support for any issues relating to the software and services on our servers, but you will need to contact the software manufacturer or visit their relevant online support pages for help with the software that they provide.
To Set Up Your E-mail Account in Windows Mail
1. In Windows Mail, from the Tools menu, select Accounts. 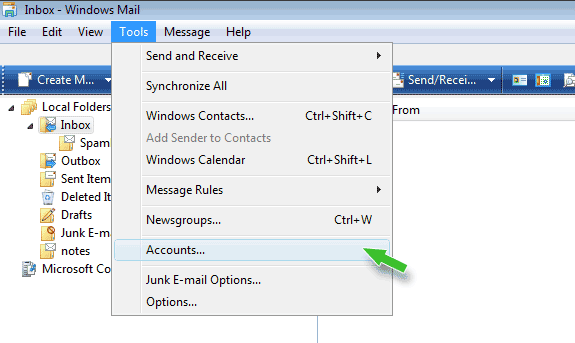
2. On the Internet Accounts wizard window, select Add. 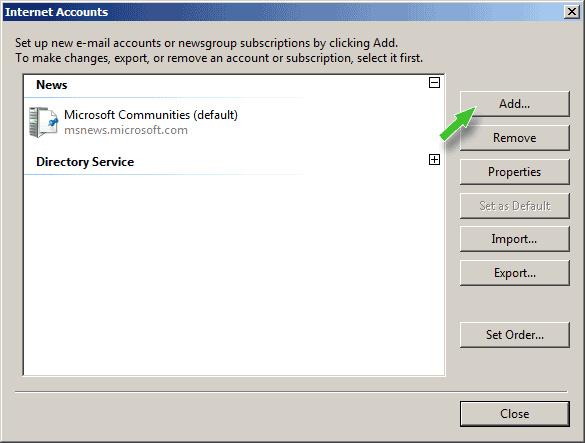
3. Choose E-mail Account, and then click Next.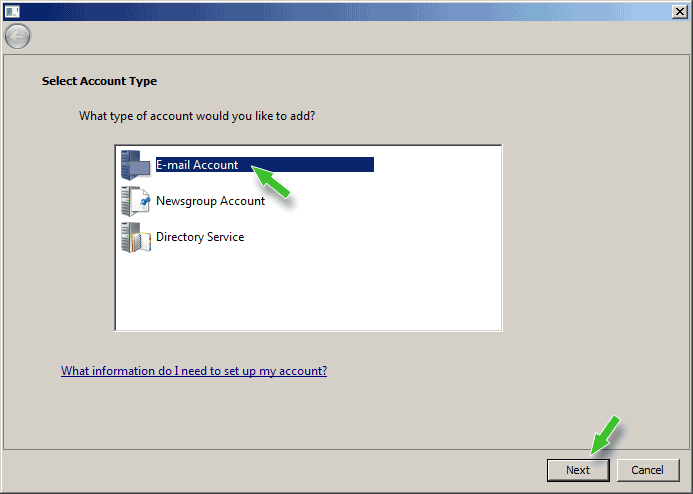
4. Enter your first and last name, and then click Next.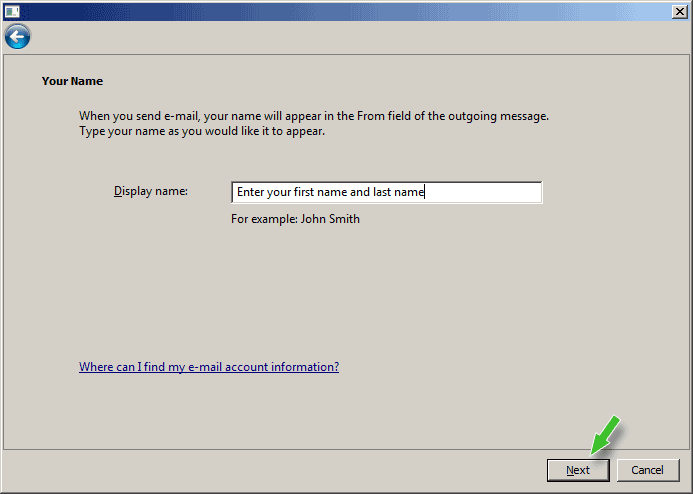
4. Enter your full email address, and then click Next.
5. On the Set up e-mail server window, select POP3 as your Incoming e-mail server type.
6. In the "Incoming e-mail server" box, enter the incoming mail server (POP3) that is provided in your setup email
7. In the "Outgoing e-mail server" box, enter the outgoing mail server (SMTP) that is provided in your setup email
8. Tick the box that says "Outgoing server requires authentication"
Click Next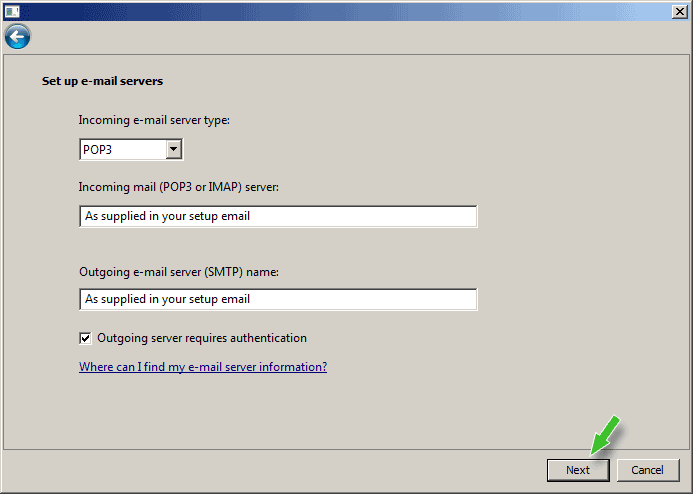
9. On The Internet Mail Logon screen, Type your full email address in the "Email Username" box, and in the "password" field type the password that you created for this email box in your control panel.
Click Next. 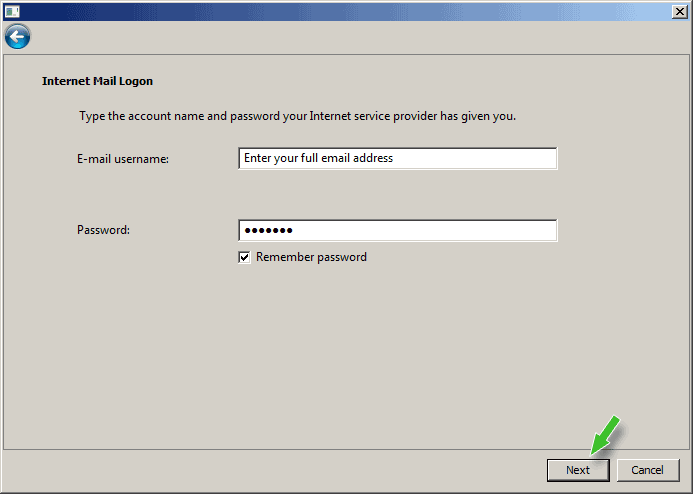
10. Tick the box that says "Do not download my e-mail at this time" and click Finish.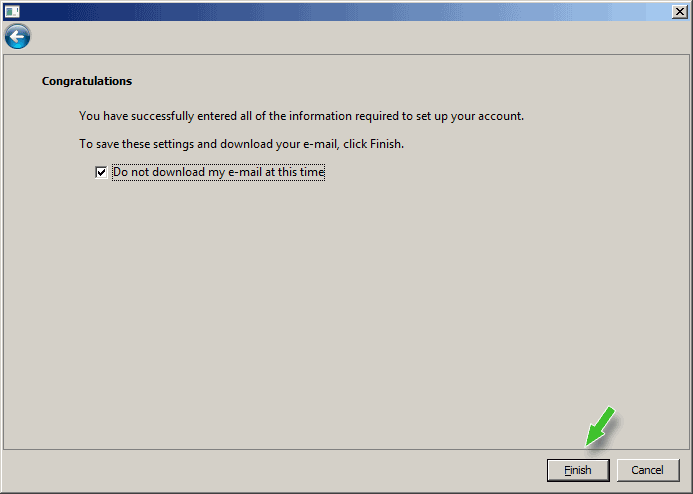
You should now be back on the "Internet Accounts" screen
11. Select the email account you just created, and click "Properties".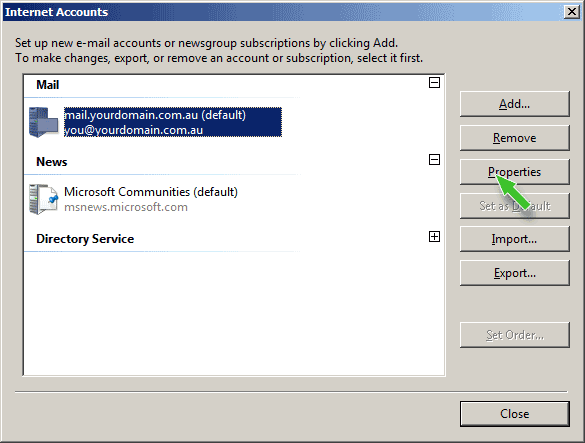
8. Go to the Advanced tab, and change the Incoming Mail (POP3) Port to 995 and the Outgoing server (SMTP) port to 465.
Tick both "This server requires a secure connection (SSL)" boxes. All accounts now support free SSL.
9. Select "Leave a copy of messages on the server", "Remove from server after 5 days", and "Remove from server when deleted from deleted items".
10. Click OK. 
11. Back on the "Internet Accounts" screen, click Close. Your account should be completely set up.
NOTE: As a courtesy, we provide information about how to use certain third-party products, but we do not endorse or directly support third-party products and we are not responsible for the functions or reliability of such products.
Should you have problems sending mail after you have followed our instructions, please let us know. We require your email address, it's password and your IP address to be able to resolve most email issues. Your IP address is displayed at the bottom of this page.