This guide will show you how to set up iPhone (iOS 7) so it will send and receive mail for your email account. Please follow these instructions carefully. If you get stuck, go back and try again.
Please Note: We provide online tutorials to help you configure your email software as a courtesy. However, our support staff are unable to provide any support on how to use or configure third-party software on your computer, laptop, tablet or smartphone. We will provide support for any issues relating to the software and services on our servers, but you will need to contact the software manufacturer or visit their relevant online support pages for help with the software that they provide.
Step 1 |
|
| Open the 'Settings' app |  |
Step 2 |
|
| Scroll down and select 'Mail, Contact, Calendars'. | 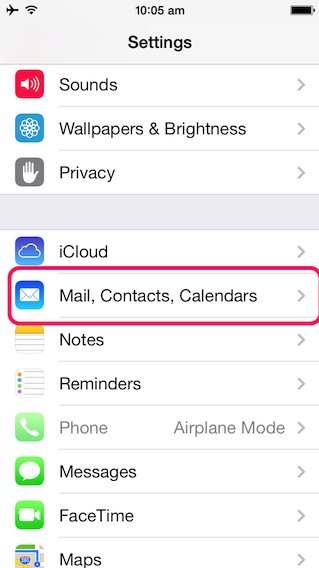 |
Step 3 |
|
| Select 'Add Account...'. |  |
Step 4 |
|
| Scroll down and select 'Other'. | 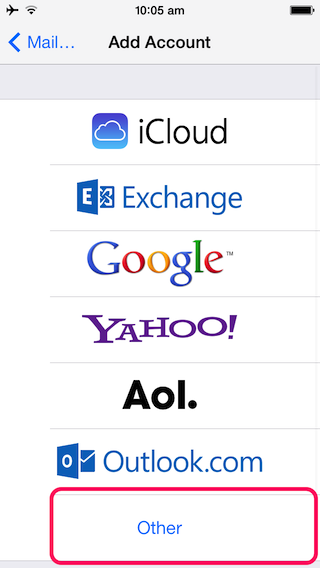 |
Step 5 |
|
| Select 'Add Mail Account'. | 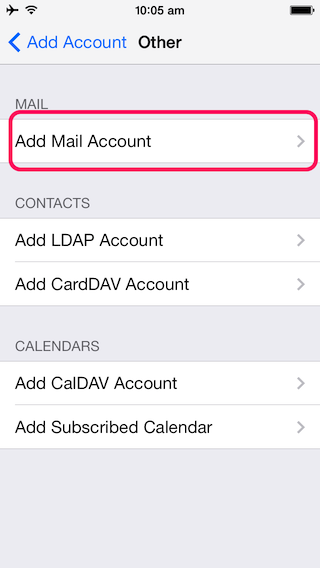 |
Step 6 |
|
| 1. Enter your name 2. Enter your email address (ie fred@demo.com.au) 3. Enter your password 4. Enter a description for the account (optional) 5. Press 'Next' |
 |
Step 7 |
|
| Ensure POP is selected (it should be by default). | 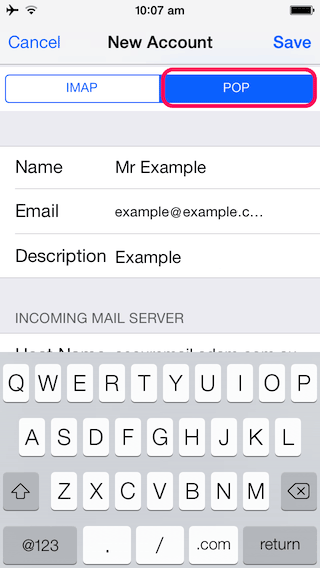 |
Step 8 |
|
| Enter 'Incoming Mail Server' settings: 1. Your "Host Name" is provided in your setup email. (e.g. mail.yourdomain.com) 2. User name is your email address (ie yourname@yourdomain.com.au) 3. Password is the password for your email address |
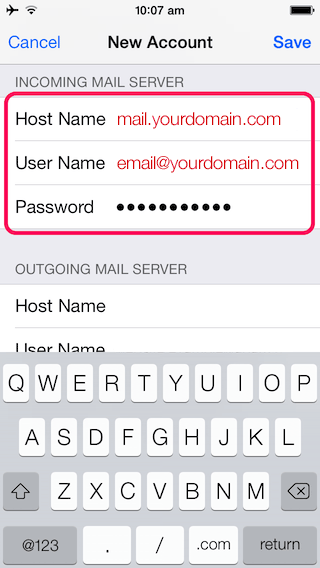 |
Step 9 |
|
| Scroll down and enter 'Outgoing Mail Server' settings. 1. Your "Host Name" is provided in your setup email. (e.g. mail.yourdomain.com) 2. User name is your email address (ie yourname@yourdomain.com.au) 3. Password is your password 4. Press 'Save' |
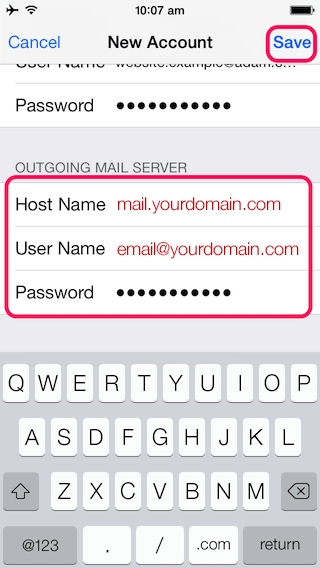 |
Step 10 |
|
| You should now see the new email account which you have created. Press the home button to return to the home screen. |
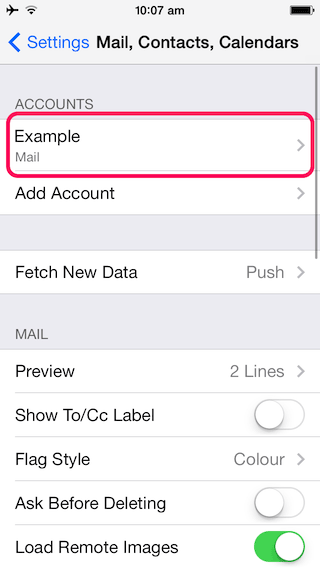 |
Step 11 |
|
| Now select the 'Mail' app and commence using your email. | 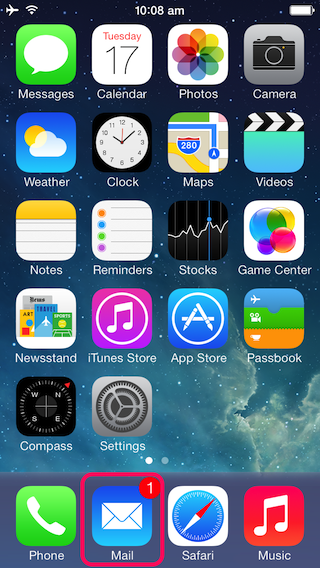 |
